We found it!!!
Have you ever sat at your desk, hoping on a miracle, that somebody somewhere will develop a fully comprehensive application for tracking network information??? I know I have, along with millions of other fellow network professional’s I have to assume. What exactly am I referring to? IP addresses, vlans, VRF’s, Rack Elevations and on and on and on. We all have to keep up with this information, for most it is located in spreadsheets; some in notepads; others try to lock it all away in the vast empty space we call a brain.
So, the stage is set. Yes, there are claims of applications that can keep track of what your CORE router IP address is and what vlan you assigned to one of your customers, or even where in the bloody rack it sits in relation to your other devices. Some can even keep track of which VRF routing table your management lies in along with which physical port it connects to. Going a little further, maybe the application claims to give you a basic map layout to which you can refer to…
BUT, very few paid applications actually combine most of these functions into one and very little if any Open Source projects do at all. Although I can think of maybe one or two programs such as iTop or phpIPAM that combine some useful features such as IPAM and documentation pools etc.
Which brings us to Netbox.
Netbox is a swiss army knife, a gem, a diamond in the rough. It combines all the features every person in the networking world needs, wants and should have. We found Netbox on packetlife.net which is run by Jeremy Stretch and who subsequently developed Netbox. If you want to read more about how it came to fruition, take a look here.
Basically, this is what Netbox does and it does it extremely well, its also Open Source and completely FREE:
- IPAM – IP Address Management
- DCIM – Data Center Infrastructure Management
- Single Converged Database
- Circuit Provider Management
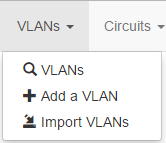
- Vlan Management
- VRF Management
- Multi-Site (tenancy)
- Rack Elevation
- Connection Management – Interfaces/Console/Power
- Customization Header For Logo’s etc
- And More!
Here are a few screen shots to highlight some of the above features:


Hopefully if you are as geeky as we are, you are biting at the bit to give this puppy a try. In that respect, there are a couple of options for you to give it a go.
- Follow the written documentation provided by Jeremy. I have to say, the instructions are pretty spot on. They are lengthy though with the components needed in Linux to allow Netbox to work. You can find the documentation here if you wish to try yourself. I will not be going over the installation steps in the post because they are cemented in the provided link; though have no fear, there is the second option…
- I took all the brain hurt and built a Virtual Machine and installed/configured Netbox for you, just follow the below steps and voila. Currently I have it ported to an OVF which you can use with VMWare ESX, VMWare Workstation.
Just follow these easy steps and you will have Netbox up and running in about 15 minutes (vs ???, I cant remember how much time I spent but still!). This is for VMWare ESXi using vSphere client.
- Download the OVF from here
- Select ‘Deploy OVF Template’ from the file menu in vSphere
- Browse for the downloaded OVF then click next
- Click next again
- Give your netbox server a VMware name
- Choose which Datastore to install to
- Pick whether you like to Lazy provision or Thick provision (if you don’t know what this means, you probably should not be using VMWare)
- Click next
- Click Finish
Now this gets a provisioned server with Netbox installed, but don’t power it up yet, there are still a few more steps to complete.
You will need to add an Ethernet Adapter.
- Right click your server
- Select ‘Edit Settings’
- Click on ‘Add’
- Select ‘Ethernet Adapter’
- Follow the prompts and finish
Now you can start the server and open the console to watch it boot and perform the final couple of steps and you will be up and running.
Once the server is at the login prompt, go ahead and login using these credentials (all usernames and passwords for the site and database are the same):
Username: netadmin
Password: netadmin
At the #, type ‘ifconfig’ and find your current IP address (hopefully assigned by your DHCP server on your network if you installed the network adapter as above) and note it.
ifconfig
Again, at # do the following using nano (my personal preference), you could substitute for your own like vi.
sudo nano /opt/netbox/netbox/netbox/configuration.py
The only parameter you need to change is the ALLOWED_HOSTS which needs to be the IP Address of the server and/or DNS name you want to assign. This is a security precaution to only allow web requests to either the IP or DNS configured in this file. Once you have edited, exit and save.
Next, we need to restart a service called supervisor.
sudo service supervisor restart
That’s it, your done. Open your favorite web browser and go to your server IP/DNS to login. Creds are posted above.
In summary, Netbox seems to be the solution many of us are looking for to keep us straight in the networking life. I for one will be glad to get away from spreadsheets, documents strewn about and in-cohesive scribble by other people; to a centralized repository of cohesive information and network bliss!